EX4: Creating and incorporating moving image / video with Adobe After Effects & Adobe XD

I've followed the week six instruction in this video to become comfortable with the interface and start to grasp its features. I gained knowledge on how to animate visuals over video from this tutorial. Among the techniques I experimented with were overlaying a video with a still image, timing the animation of different sections, creating a zoom-in effect with scale, and blurring the background. These lessons were simple to understand and follow, and I picked up several useful shortcuts in the process. Despite being fundamental, the abilities imparted are transferable and applicable in a variety of contexts.


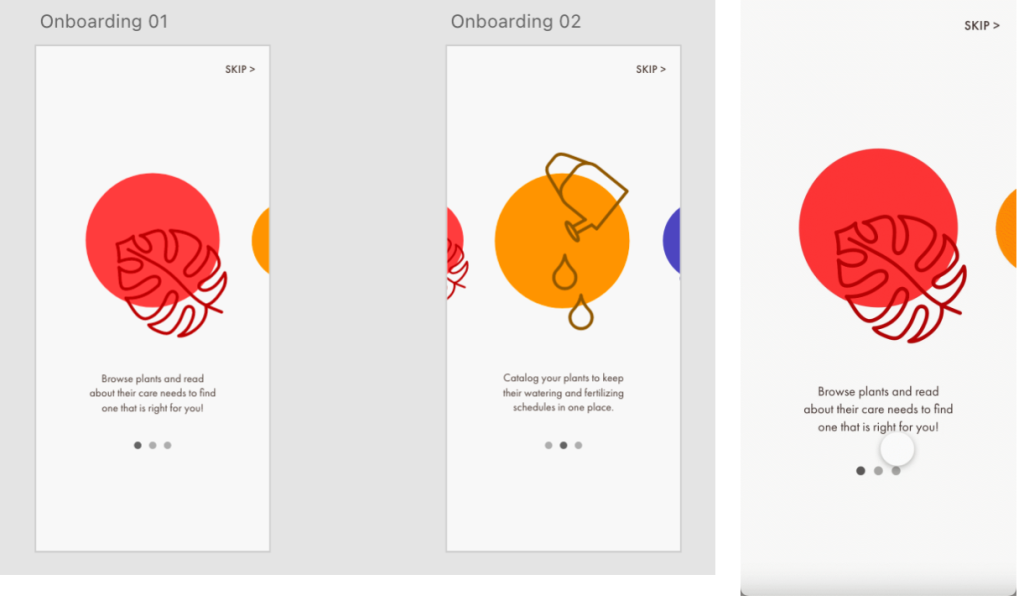
By utilising Adobe XD's auto-animate feature, we produced the first moving picture component. In this part, as "cards" were moved towards the centre, the cards on the outside would decrease and the cards in the centre would grow. Repositioning and resizing the parts to create a fluid transition between them was the only more challenging aspect of this technique. Nevertheless, it still required numerous artboards to complete. To trigger the auto-animate action when a new artboard was selected in the prototyping section, easing might be included if desired. Additionally, there was an additional layer to this since you could use a drag to initiate the transition instead of pushing a button.

Making overlays was the other aspect of moving images in Adobe XD. You can choose the menu overlay's fading or sliding effect as well as the direction in which it should appear when building it. In this particular instance, I decided to have it slide up. Since I have experience with overlays, I found them to be fairly easy to create.


Now that we're using After Effects, we started with the very beginning because we had never used the program before. We just added text layers on top of videos. After Effects is a relatively straightforward program to use, thus I was able to pick this up very quickly. Subsequently, we started incorporating other effects into the text, such fading the letters in or adding a matrix or background blur. Since they were made by overlaying pre-set effects on the text or backdrop, they were all quite easy to make.


Next, we started animating the text itself. To start, we made the letters move in from the top or bottom or from one side to the other. At this point, we started utilising some of the marginally more sophisticated capabilities, such as the softening curve. This made it possible for me to design a less rigid movement pattern, which helped me achieve a more smoother acceleration and deceleration as it approaches the finish line. Additionally, I was able to create a "Text Tunnel" effect by wrapping the text around an object and then letting it scroll around it. Then there was the issue of using outlines to make the text visible. This one was also pre-set, but it required more setup than the others because you could choose the thickness of the outlines, the order in which the letters should appear, and the location on the letter where the animation should begin.


All in all, I've found these tutorials to be fairly straightforward to follow, especially the ones in Adobe XD. Since I was already familiar with the program, a lot of the lessons either covered functions I was already familiar with or showed me how to use tools I was already familiar with. However, the After Effects tutorials were a little trickier because I had never used the program before. I had no idea how to navigate the layout or where the various functions were located. As we completed more of the tutorials, though, my familiarity with the program increased and the difficulty level decreased. Although I am confident in my ability to use the program for this project, there are still some parts that I don't fully understand, consisting of some of the more complicated animation methods, where I would be completely lost on how to use them without the guides to find them and tell me which settings to change to get the right effect.